Development testing workloads have long been a marquee process for cloud computing. The very nature of DevTest, with short bursts of compute-intensive workloads followed by long periods of idle, lends itself perfectly to the cloud both in terms of price and performance. Here is an easy 15-minute how-to guide to load testing with Google Container Engine.
The growing use of Docker containers are further improving the speed and cost efficiency of these “bursty” workloads. In this post, I’ll show how to spin up 401 Docker containers to allow over 4500 requests per second in a load testing scenario by leveraging Google Container Engine (GKE).
First we must spin up a GKE cluster running Kubernetes.
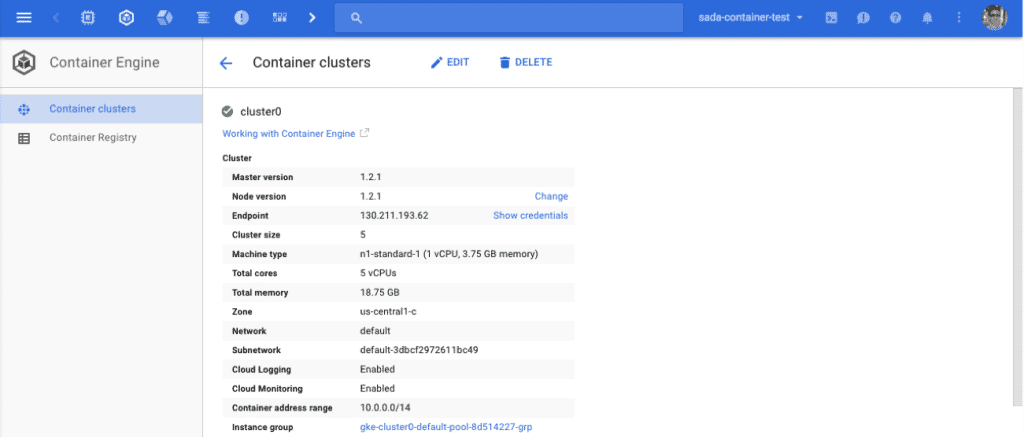
Next we’ll configure the Kubernetes command-line application to point at our new GKE cluster.
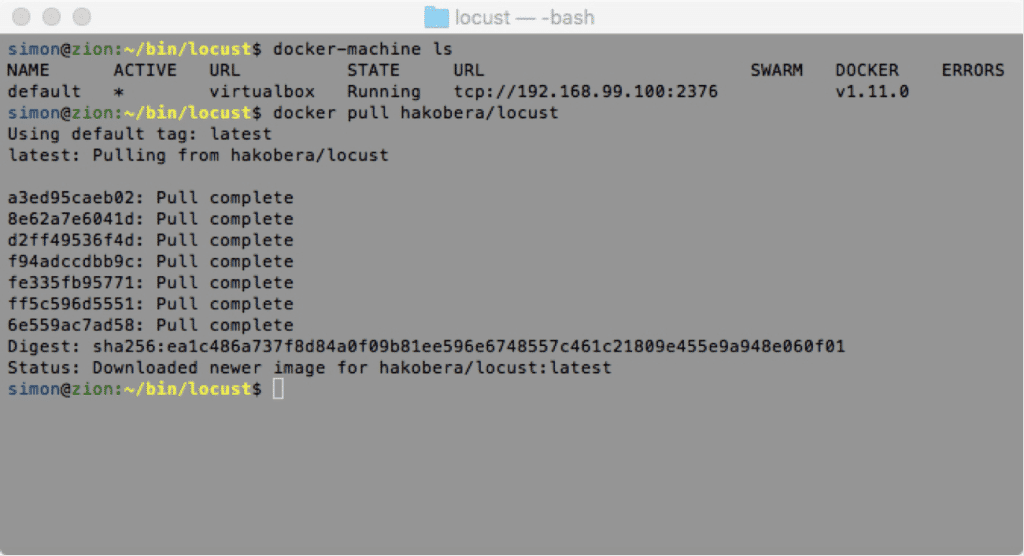
With kubectl now properly configured, we’ll pull down a pre-existing Docker container image from Docker Hub for one of my favorite open source load testing tools: Locust. Once we pull this down, we’ll also need to build out the test directory, locustfile.py which dictates how Locust will run, and the Dockerfile to tell Docker how to build our new container image, based on the original Locust template.
Now we’ll build our new container image and push it to our private Google Container Registry, thus making it ready for deployment to our cluster.
With the image pushed, we’ll now deploy our Locust master to our cluster. The master is deployed with a few environmental variables telling this Locust container that it is the master and where to point its load test.
We can now see that the master container has been pushed and one single pod is now running. Since the master is no longer doing the heavy lifting here, one is enough.
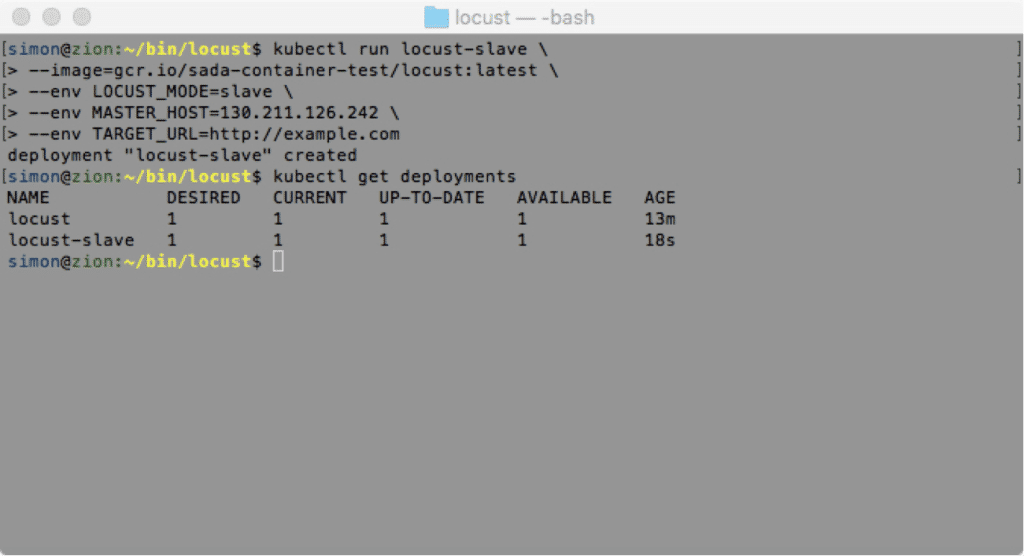
Now we’ll send the pod for deployment on the same cluster. Note that this is still based on the same original Locust image we built earlier. This time however, we’ll send slightly different environmental variables so that the pod knows where to find the master.
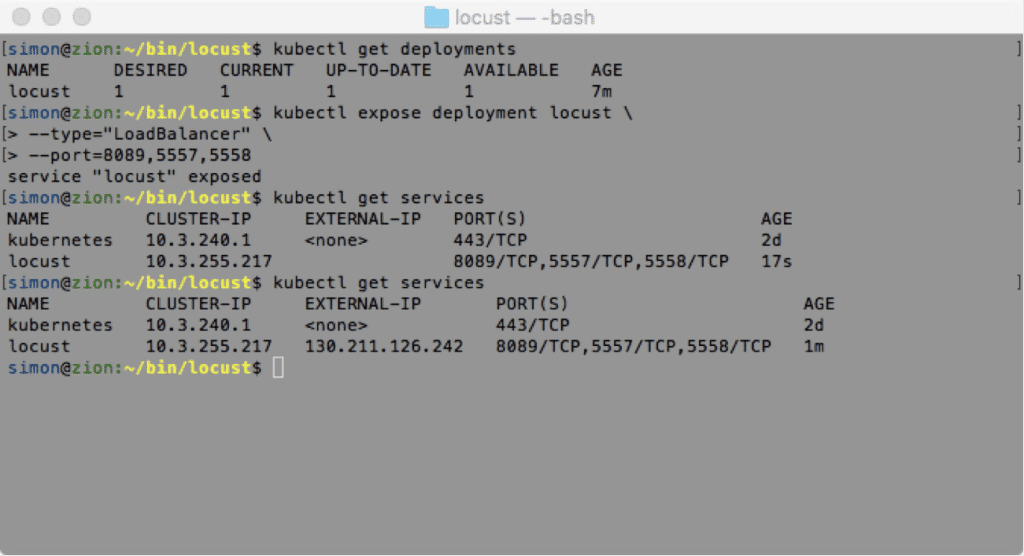
Now, since the master will be hosting our frontend via port 8089, we need to expose that port (as well as 5557 and 5558 for communicating with the pods).
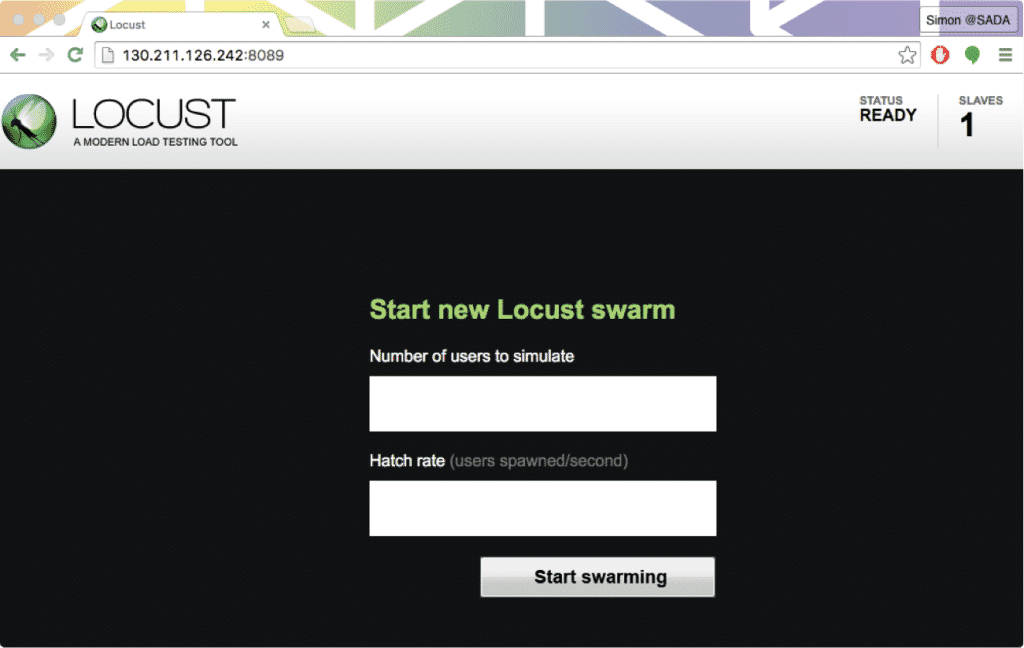
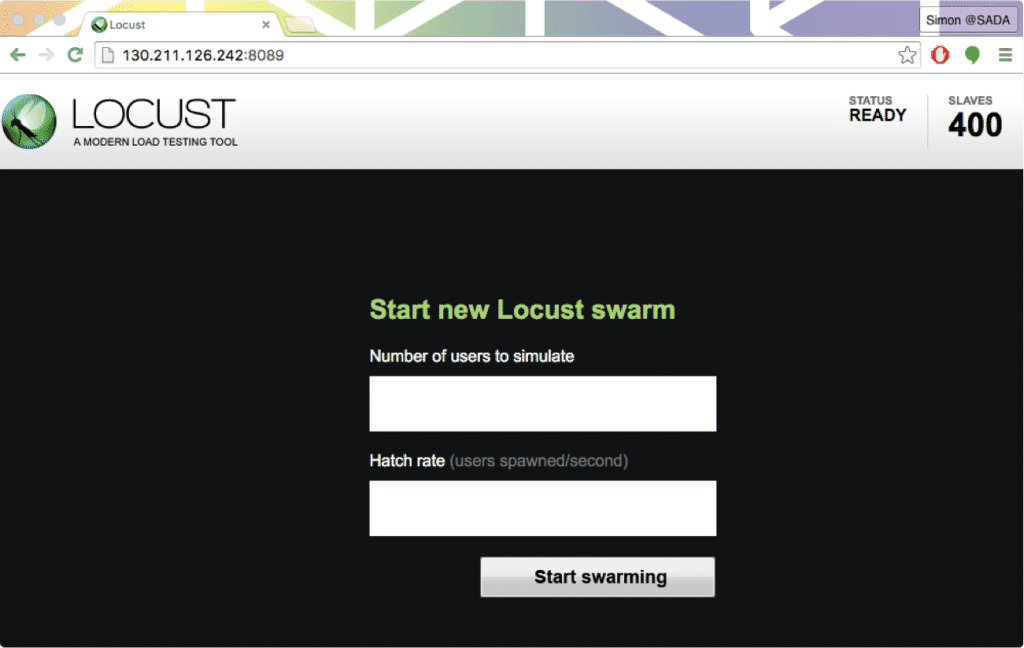
It can take a few seconds for the external IP to attach to the deployment, but within a minute we’ll see it listed as a new service. We can now verify this in the browser. Success! Our master is up, serving its frontend, and reporting a single pod.
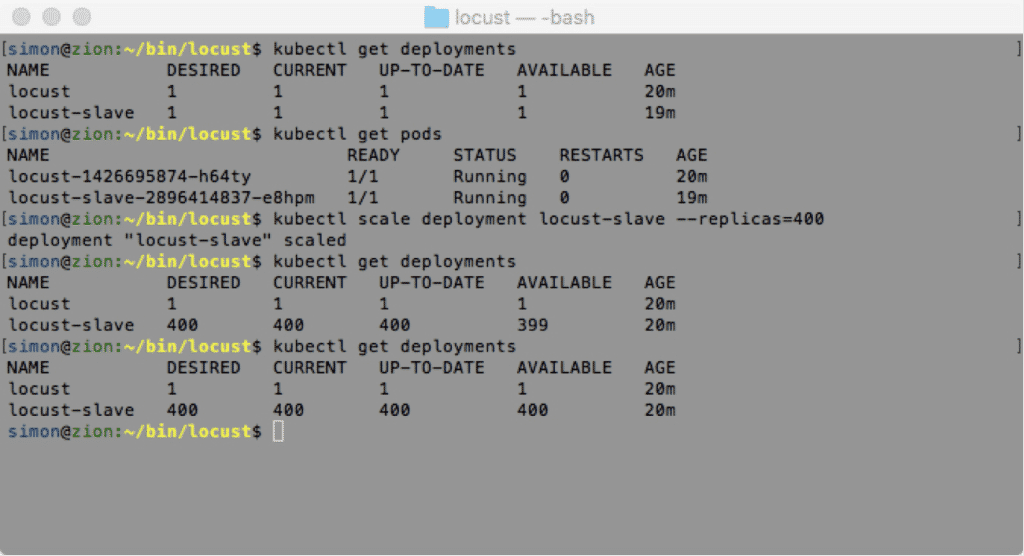
Now it’s time to scale our pods up. Luckily, this is a core function of Kubernetes and it’s extremely fast and easy to ramp up. Let’s get 400 replicas of our pod, thus giving our master 400 pods from which to execute load testing requests.
As you can see, there is only a single command required to get from 1 to 400 replica pods. 399 pods spun up in under 10 seconds. It took about 20 total seconds to get all the way to 400. As we can see, all of the pods are now available and ready to send requests. This is also immediately exemplified in the master frontend, as it’s now reporting a total of 400 pods.
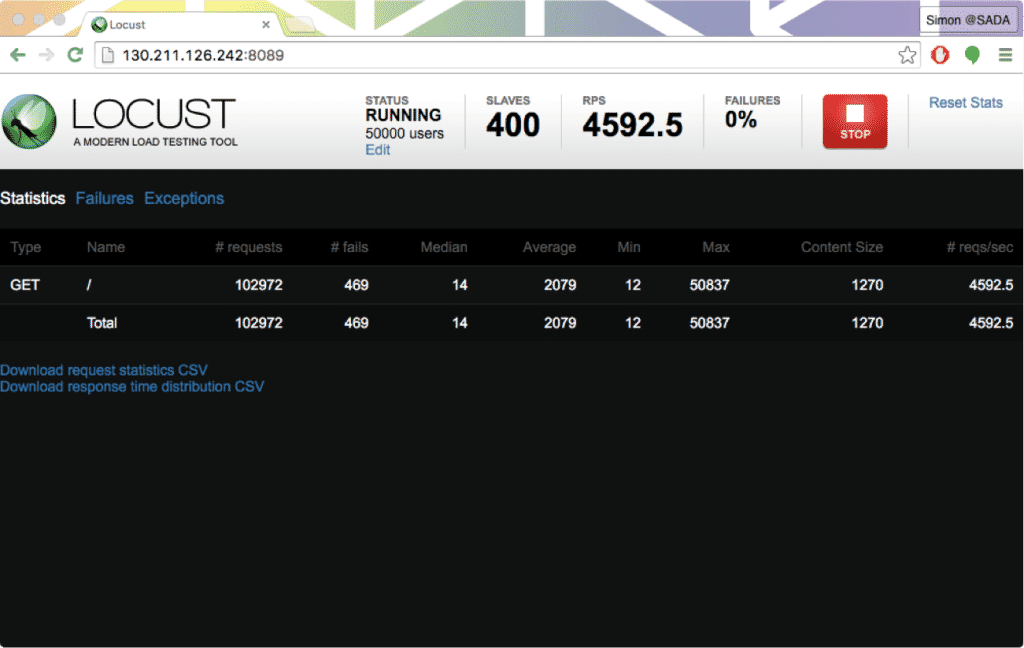
With our 400 pods up and running, we’re ready for the fun part! Let’s simulate 50k users.
And just like that, in under 10 minutes, we’re able to get our 400 pods running in GKE at a collective rate of over 4.5k requests per second. Better yet, we’ve just been incurring computing charges for a few minutes!
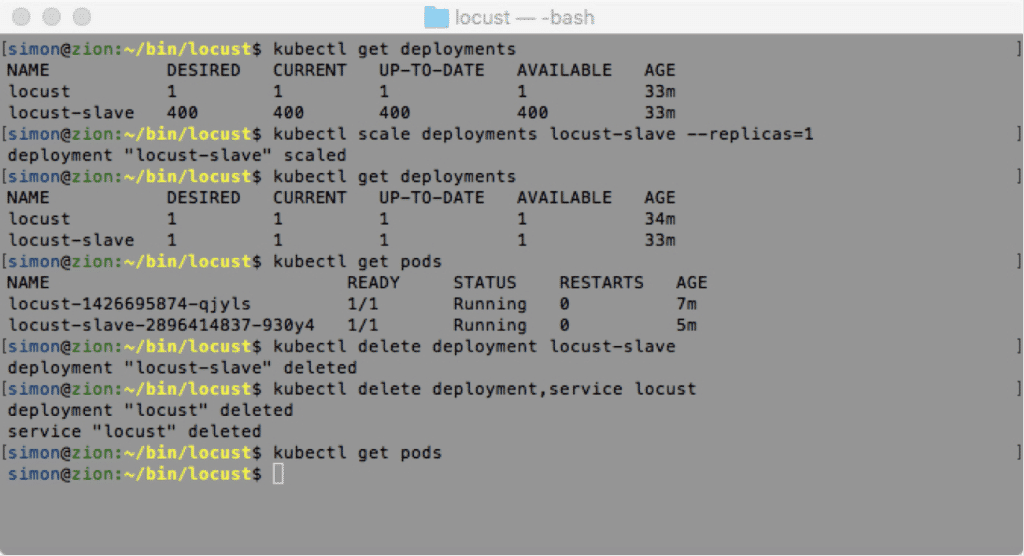
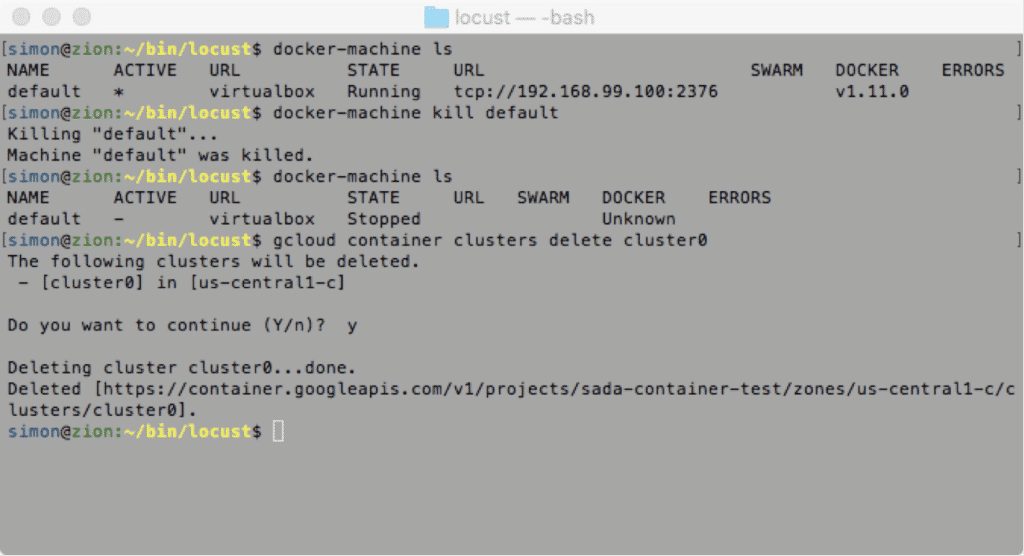
With our testing complete, and with a desire to keep our costs down, it’s time to spin down our cluster. All we need to do is first spin down our pods, deployments, and service (exposing the master).
And finally shut down the actual cluster and its underlying computing resources.
And just like that, in under 15 minutes, we’ve spun up the equivalent to 50,000 users with which to load test our web application. As you can see from this demo, it requires no more effort to push this even higher — just a bigger cluster and a higher –replica count and your imagination is the limit.


